n the drafting stage of a document, it is possible to either upload an already prepared file or create a file within the system.
To create a file, during the drafting stage, the responsible user must click on the Create File menu.

After that, the system will display the screen for creating the document.

On this document creation screen, several options will be listed as part of the editor's formatting standards, as detailed below:
File – allows you to perform some actions related to the file, such as:
New Document – through this menu, you can create a new document. When selecting this option, everything entered in the body of the previous file will be deleted and lost.
Preview – this option allows you to see a preview of how the created document will look.
Print – this option allows you to print the created document.
- Edit – allows you to perform some actions, such as:

Undo – this option will undo a previous action. For example, if you deleted some information, clicking the undo option will bring that information back into the file.
Redo – this option allows you to return to a later step. In other words, if you deleted some information and used the undo option to bring it back, but then realized you actually wanted to remove it, you can click redo to delete it again without doing it manually.
Cut – allows you to cut selected content from the text.
Copy – allows you to copy part of the text.
Paste – allows you to paste the content you want into the text.
Paste as text – lets you paste copied content as plain text, without formatting.
Select All – allows you to select all content entered in the file.
Find and Replace – lets you search for words in the file and replace them with others.
View – provides access to some settings, such as:
Source Code – allows you to view the document through its source code.
Visual Aids – lets you enable the display of visual elements within the document.
Show Blocks – allows you to view the content of the file in structured blocks.
Preview – lets you see a preview of how the created document will look.
Fullscreen – enables full-screen viewing of the document.
- Insert – provides several features, such as:

Link – allows you to insert a hyperlink into the text, which will direct the user to another address when clicked.
Media – allows you to insert a video link.
Table – lets you create a table within the file.
Special characters – provides a library of special characters to insert into the document.
Anchor – allows you to insert a marker within the document.
Date/time – lets you insert the date and time the file was created.
- Format – allows you to configure the formatting of the text in the created file, such as:

Bold – highlights the selected word or text in bold.
Italic – highlights the selected word or text in italic.
Underline – underlines the selected word or text.
Strikethrough – adds a line through the middle of the selected word or text.
Superscript – applies superscript style to the selected word or text.
Subscript – applies subscript style to the selected word or text.
Code – formats a word or text in code style.
Formats – lets you apply pre-defined text formats.
Blocks – Paragraph, Blockquote, Div, Preformatted.
Fonts – select from the available font options.
Font Sizes – select from the available size options.
Align – choose from the available alignment options: Left, Center, Right, Justify.
Line height – select from the available line height options.
Text color – select from the available color options.
Background color – select from the available background color options.
Clear formatting – removes all formatting from the selected text.
- Tools – provides some features such as:

Source code – displays the file’s text in source code format, allowing you to view the page content with its HTML or markup structure.
Word count – counts the number of words entered in the file, helping with text control within limits or for review purposes.
- Table – allows the creation and editing of tables:

Table – lets you insert a table into the document.
Cell – allows you to configure the table’s cells.
Row – allows you to configure the table’s rows.
Column – allows you to configure the table’s columns.
Table properties – lets you adjust the table’s general settings, such as borders, size, and style.
Delete table – removes the table created in the document.\
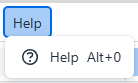
- Help – this option provides information about the tool and shortcuts to perform actions.
Below the menu, you will find shortcuts for common actions, allowing you to complete tasks quickly and easily without navigating through the main menu options.

After creating the document with the desired settings, click Save to store it. If you prefer to exit without saving, click Close.

After saving the information, the system will confirm that the file has been successfully converted to PDF.
Next, you will be directed to the task screen, where you can complete the drafting of the document, as explained in this article.
