
In Step 4 of the non-conformity treatment flow, the focus is on planning the corrective action that will be taken to permanently eliminate the previously identified root cause.
This is a practical and strategic step; it is where what will be done, by whom, when, and how is defined.
Information on the Step
At the top of the screen, you will see the NCR code (e.g., 2025:044:00), the "View Report" button to consult details already filled in, the description, the status, the step's deadline, and the person responsible for planning.
This information helps in tracking the resolution:
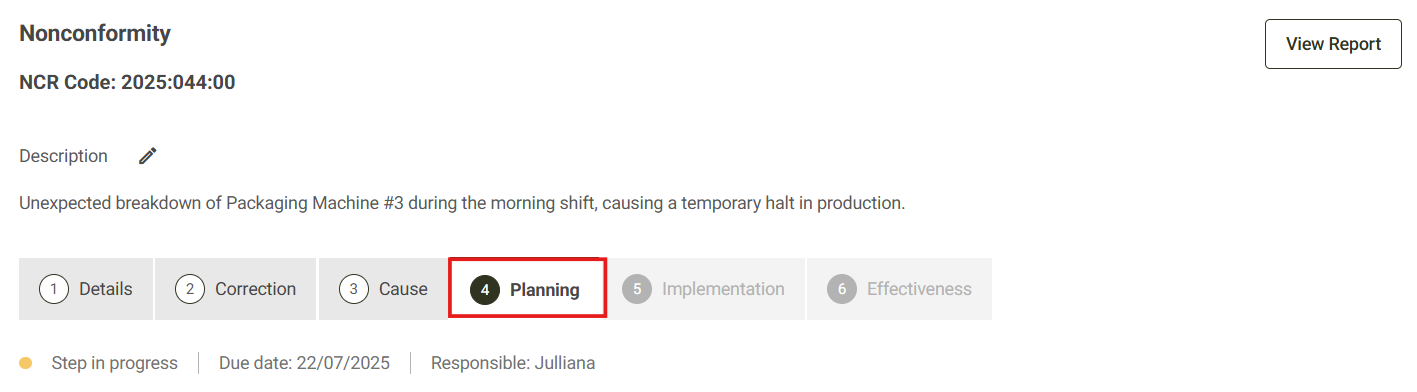
In the Description field, by clicking the pencil icon, the system will allow the content to be edited, if necessary:

Generate corrective actions with AI.
To facilitate the planning of corrective actions, the "Generate corrective actions with AI" button is available .
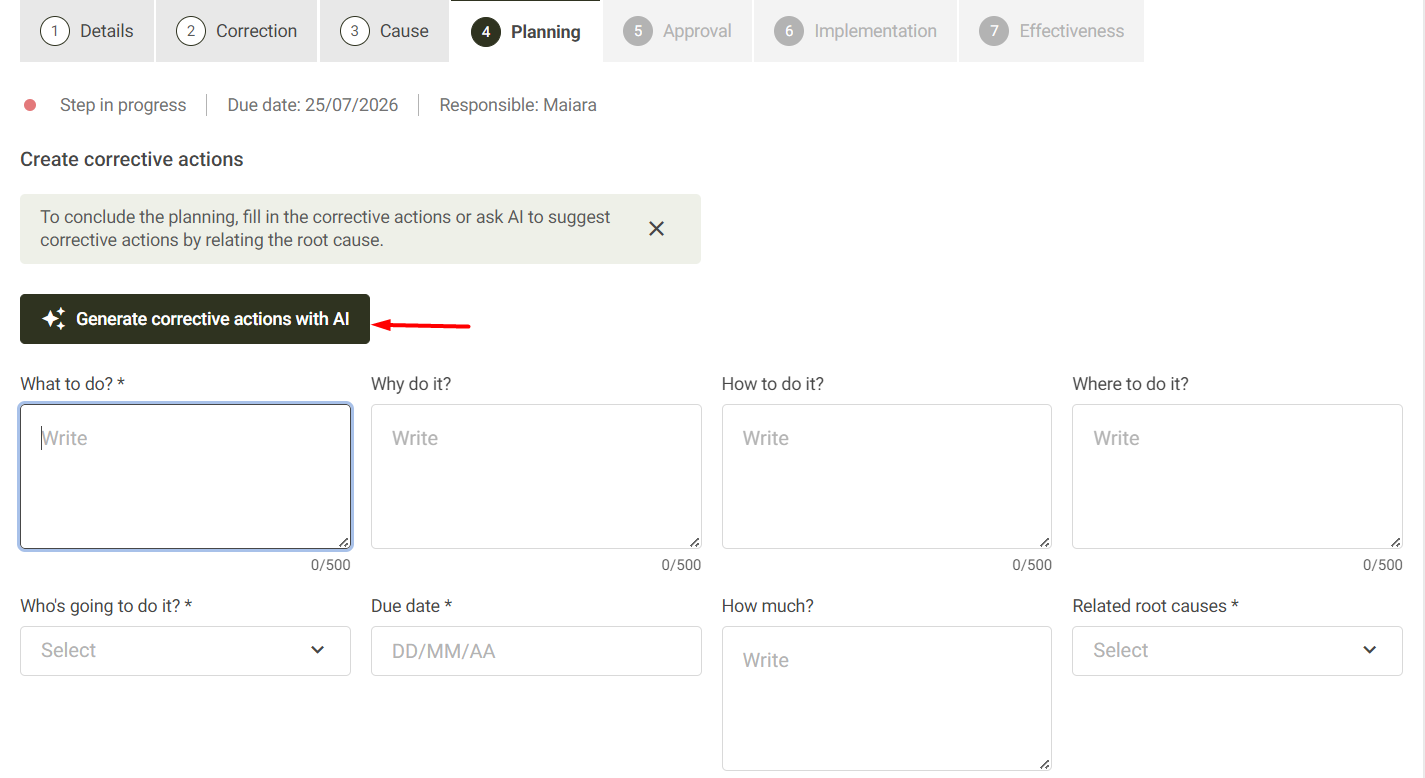
The button will only be enabled when the non-conformity meets the following requirements:
- If the Nonconformity Description is filled in;
- There must be at least one registered root cause .
By clicking on Generate corrective actions with AI , the system will display a window with five suggestions for corrective actions generated by artificial intelligence.
Each suggestion may contain the following fields:
- What to do ;
- Why do it ?
- How to do it ;
- Where to do it ;
- Who will do it ?
- Deadline — automatically filled with the day after the current date;
- How much ?
Furthermore, all root causes registered in the nonconformity will be automatically associated with the generated suggestions.
Select the suggestions:
In the suggestions window, the user will be able to:
- Select one or more corrective actions;
- Confirm the selection to add the actions to the nonconformity;
- Close the window without saving the suggestions.
If the window is closed without confirming the selection, clicking on Generate corrective actions with AI again will present five new suggestions , different from the previous ones.
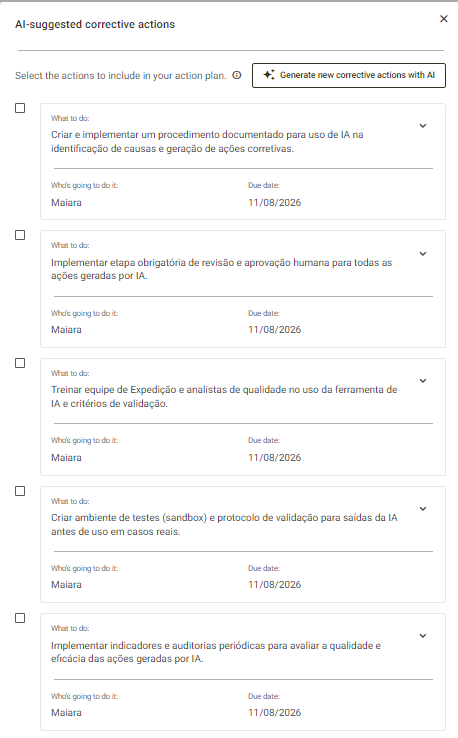
After confirmation:
The selected actions will be automatically added to the Corrective Actions section of the nonconformity.
Once included, the actions follow the system's standard flow, allowing:
- Edit the action fields;
- Exclude the action, when necessary;
- View the actions in the non-compliance report.
Important: The suggestions generated by AI are a planning aid. The user should review the information and make any necessary adjustments before confirming and using the actions to address the nonconformity.
How to fill out the planning form:
If you prefer to register the corrective action manually, the fields that must be filled in are listed below. Required fields are marked with an asterisk (*).
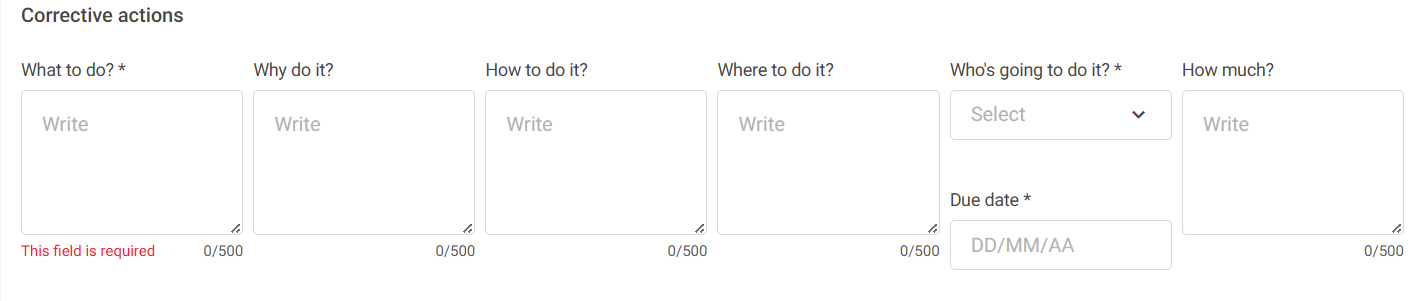
What to do?*: Describe the action to be executed. Ex.: "Reorganize the stock to prevent damage during loading."
Why do it?: Justify the action. Ex.: "To reduce the recurrence of damaged cargo."
How to do it?: Explain the method or procedure. Ex.: "Create area signage and an alternative layout."
Where to do it?: Inform the execution location. Ex.: "Warehouse – shipping department."
Who's going to do it?*: Select the person responsible for the action in the dropdown list.
Due date*: Define the deadline for the action's conclusion.
How much?: Optional field to estimate costs, resources, or time required.
⚠️ Attention: the "What to do?", "Who's going to do it?", and "Due date" fields are mandatory and must be filled out to proceed.
If you want to view the report of the actions, simply click the View Report button, located at the top of the screen:

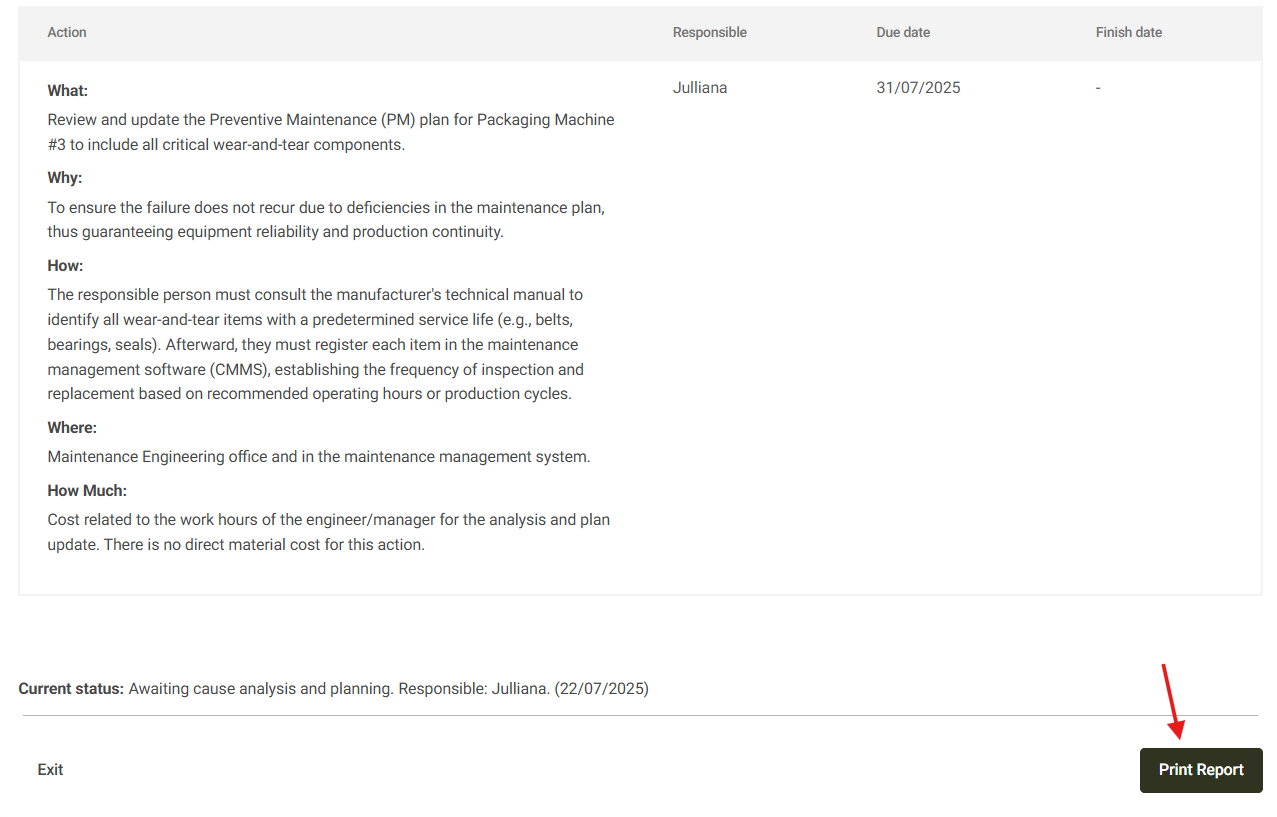
By scrolling the report to the end, you can print or save it as a PDF using the Print Report option:
After filling out the fields, click Save to save. Use Back if you wish to review previous steps.
Click Conclude to advance to Step 5 – Implementation.