To register a document category, it's important to consider that it will be used to facilitate the organization and retrieval of documents. Therefore, the name and configuration applied to this category should be designed with a general context in mind.
To illustrate the context above: the category Operational Procedure (O.P.) was created. This category will be used to link all internal documents related to operational procedures across all departments of the company. For example: O.P. Forklift Operator, O.P. Customer Service, etc.
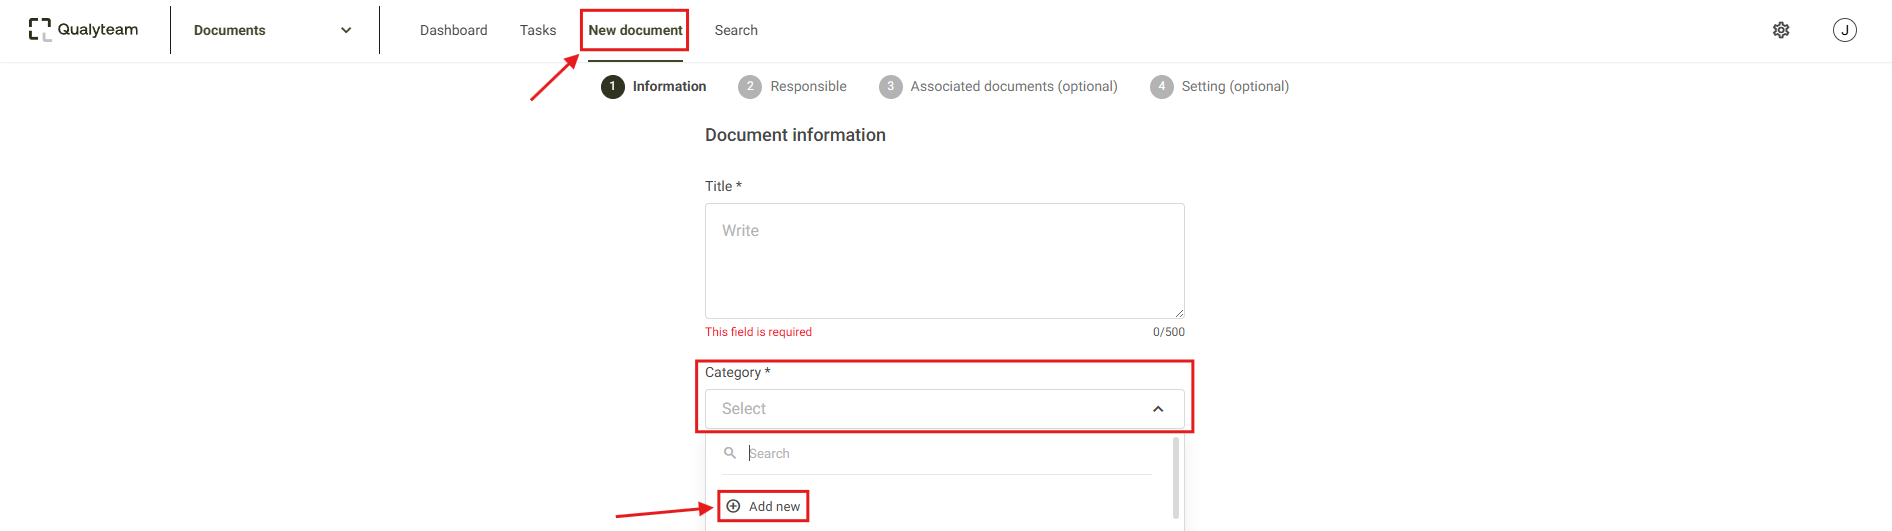
To register a document category, follow the steps below:
Click on the New Document menu, then in the Category option, select the Add New button.
Next, the screen to enter the new category information will be displayed.
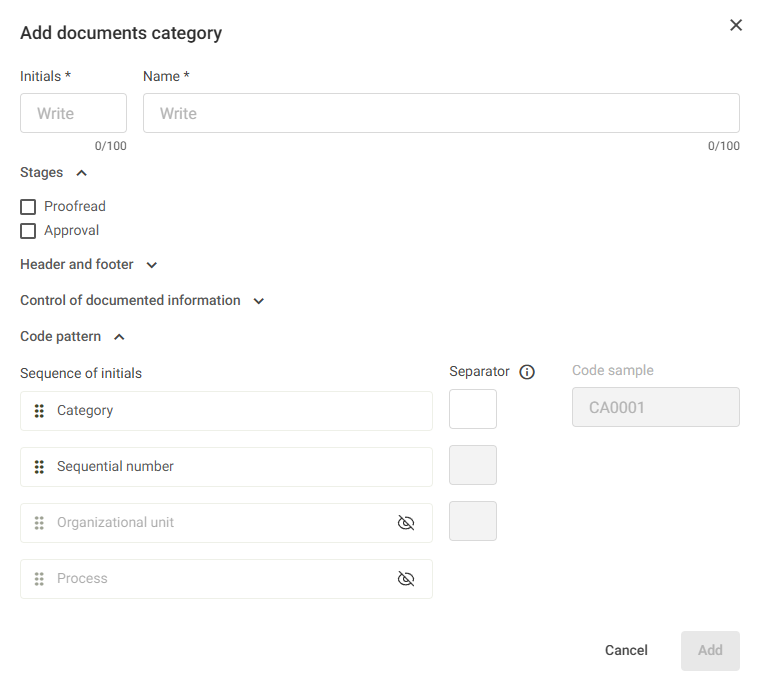
In the Initials field, enter an abbreviation for the category name, such as WT for the category Work Instruction.
In the Name field, enter the description of this category.
In the Stages field, select the steps that will apply to documents added to this category.
After that, the option to add a header and footer to documents created within the system will be available. For more information about this feature, click here.
Click on the Header and Footer option, select Header, and the option to upload your company’s logo will become available.
Below, an example image will be shown to illustrate how the header will appear when creating a new document.
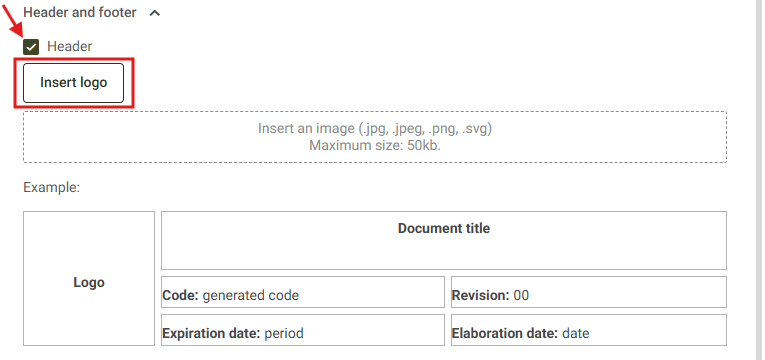
Next, if desired, select the Footer option. Just below, a sample will also be displayed showing how the footer will appear in the document.

Control of documented information:
In this field, you can define how these documents will be controlled and documented. By default, the system already comes with these options selected.

If you select the manual configuration option, you must fill in all the fields related to document control (Distribution, Preservation, Access, etc.).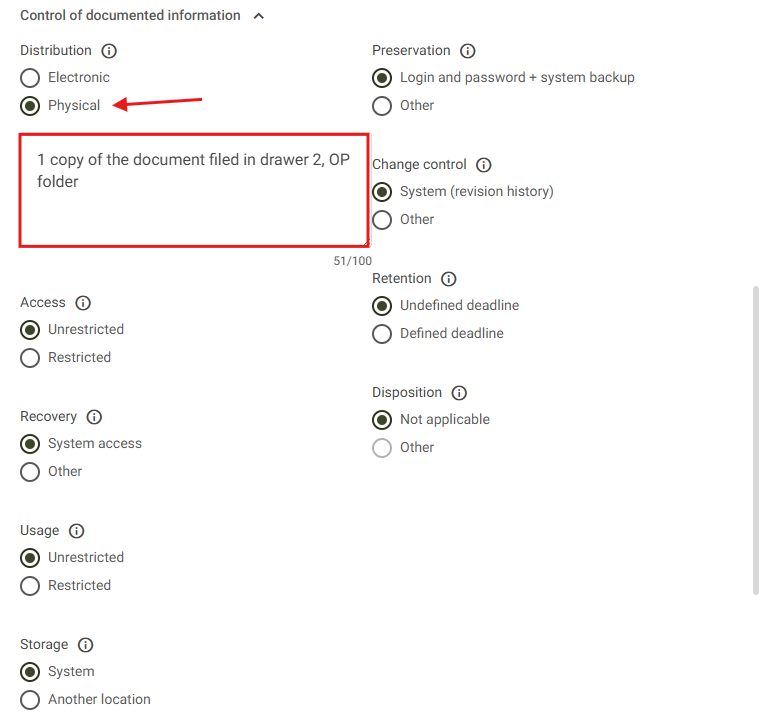
When you hover over the name, the definition of each control option will be displayed. You can use this feature for any field related to document control.

In the Code pattern field, you can choose how document codes will be defined. The codes may include the following fields: Organizational Unit and Process. If you wish to add this information, follow the steps below.
The Category and Sequential Number fields are set by default. If you want to change their order, click on the one you want to move and place it in the desired position.
To have the system display the acronym of the unit and the process in the document code, enable these fields by clicking the image next to their name. You can define which fields should appear in the code according to your organization’s needs. It is possible to choose only the unit, only the process, or both fields.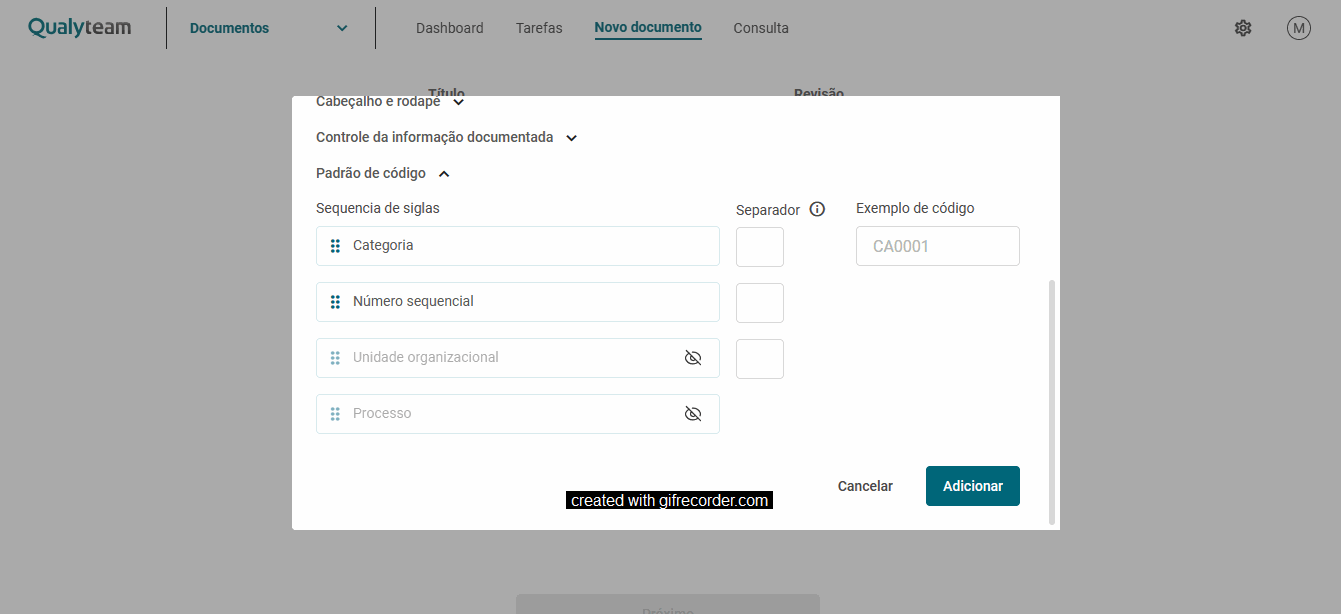
You can also define a separator character for the fields. To do this, enter it in the Separator field next to each item. Note: Only special characters can be used.
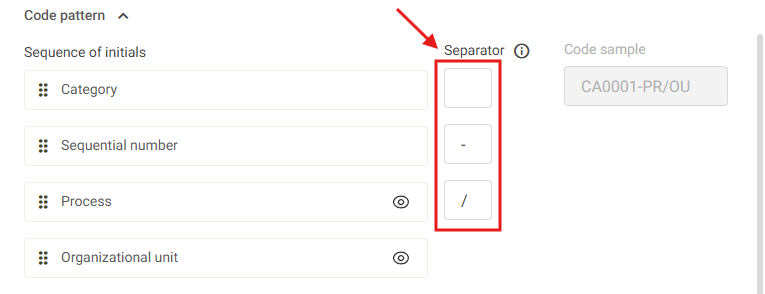
As you define the code pattern composition, the system will display in the Code sample column how the final code will look.

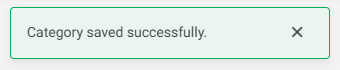
After entering all the category registration information, simply click Add to complete the registration. The system will confirm that the category has been successfully saved.

PIf you select the manual configuration option, you must fill in all the fields related to document control (Distribution, Preservation, Access, etc.). When you hover over each field, a brief definition will be displayed.
erguntar ao ChatGPT